This web page describes the construction of Bill’s Glass Shop which is a Walther’s Cornerstone structure. The methods used in this article can be applied to other similar models in the Cornerstone line as well as Design Preservation and other model manufacturers.
The goal is to create a model that looks like a real building with convincing brickwork. As you plan the build think about the colors of the brick and any unique features you would want to include. Additional details can include signs, lights, and window markings.
Tools and Materials
I used the following tools and materials to construct this Walther’s Cornerstone kit.
- Small File
- Sandpaper
- Small Nipper / Cutter
- Hobby Knife
- #11 Knife Blades
- CA Adhesive
- Plastic Adhesive
I used a Northwest Short Line True Sander to ensure the wall sections were square before final assembly. This is not a basic tool but it made the job much easier.
- Magic Markers
- Dark Brown
- Dark Umber
- Light Umber
- #2 Paint Brush
- Flat Artist Brush (dry-brushing)
- .040 Styrene sheet (Evergreen)
I also used a Badger Model 200 single action airbrush to paint the base color of the brick. This is not required as hand-brushing will also create a quality finish on this model.
Getting Started
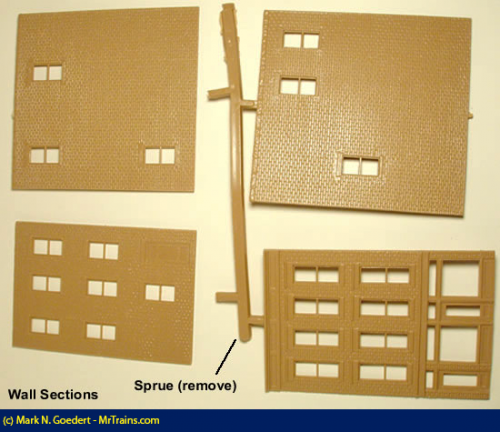
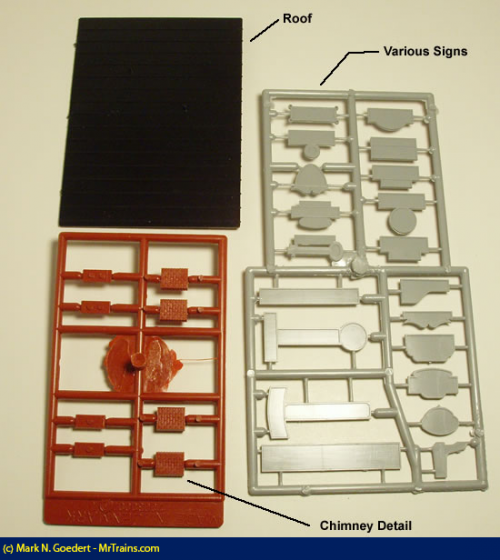
The first part in assembly is inspecting the parts to ensure all the components needed are included in the kit. As you look over the parts you will also want to ensure that all the parts are intact and not damaged. Use the provided instruction sheet as your list to check that all the parts are provided. The instruction sheet will also show you how the parts fit together so you can get an idea of when to paint and add extra detail. When building a kit, you may want to alter the order of assembly so it will be easier to put the kit together. Bill’s Glass Shop is a basic kit with four walls and roof which can go together easily with a little care.
Cutting Parts
When you look at the parts carefully you may notice extra plastic interfering with the brick detail on the model. You can use a hobby knife with a #11 blade to remove the extra plastic. The extra plastic is a remnant of the mold used to produce the part; most plastic parts require some touching up when closely inspected. I also use a small file to remove extra material on the windows and to carve out some of the brick detail. Be very careful when sanding the thin window pieces, they can break easily.
Hip to Be Square – But Not Always
Due to the manufacturing process the edges of each wall will not necessarily be square. This slight angle to the part will prevent you from getting a good fit at each corner.
Generally, plastic parts have what is called a “draft angle” so it will separate from the mold easily. The draft angle on the edges of the parts will prevent you from getting a nice fit on the corners of your structure. Prepare the corners and remove the draft angle start by sanding the wall edges that do not have a brick pattern; sand until you get a nice 90-degree angle to make for a clean fit.
Not all edges of the walls need sanding, you only sand edges that do NOT have the brick pattern printed on the side. I used the “True Sander” tool produced by Northwest Short Line. This is a miniature sanding block and wood tool designed to sand square edges on your models. You can accomplish the same effect using a sanding block, but you must be sure to carefully sand the edges square.
I used 120 grit and 400 grit sandpaper to smooth out the corner mating edges of our model. You want to start with the 120-grit paper to take off a lot of material. Once you get close to a good edge switch to the 400 grit to sand out the large scratches of the 120 grit.
Details
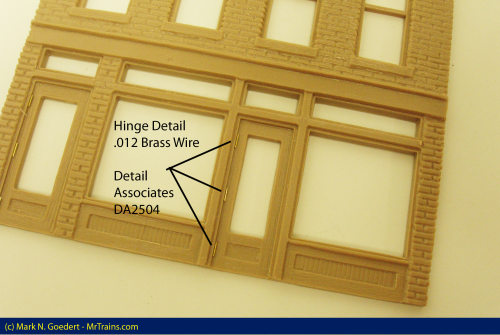
Before we paint the walls, it is easier if we add a bit of detail now. We will fashion door hinges for some of our store doors, generally hinges on the outside of a door are a security risk but our model railroad town is low in crime.
Cut three pieces of wire about 4″ scale inches long (1/16th of a real inch). The Hinge Wire is Detail Associates .012 Brass Wire (DA2504). Using super glue (CA) glue the hinges in place on the doors that you think need the detail. I used three hinges on each door. I placed a pool of CA on a scrap piece of plastic and using tweezers I dipped one end of the wire in the adhesive. When I placed the detail on the model the capillary action of the glue held the entire detail in place. If you happen to skip this step and want to put the hinges in after painting, you will have to scrape away some of the paint so the CA will stick to the plastic. Gluing a detail to a painted surface results in a weak bond and the detail could easily fall off.
Preparing to Paint
After the sanding was completed, I washed the parts in water with a few drops (2x) of dish detergent. I used a clean toothbrush to lightly scrub the parts before rinsing. We want to wash the walls in grease breaking detergent to remove mold release and hand oils from handling the model. This will help the paint stick to the model better. This step will also get rid of any dust left from the sanding step.
Tip: Wash your model with a grease cutting soap such as dish detergent. This will remove the mold release agent as well as any oils deposited from your hands during assembly. This step ensures you have a good base for your paint.
I let the parts air dry after washing, you can speed up the drying process by using a hair dryer to quickly dry the parts. If you use the hair dryer be careful to not melt or distort the walls with too much heat.
Painting
You can achieve a good look if you paint the brick walls with a brush. To make the job easier I will briefly describe how to paint the walls using an airbrush.
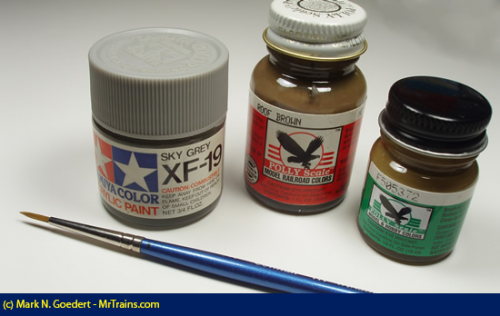
Brick Color: Polly Scale US Brown Special (F505372) – I was not able to locate an equivalent color now that Polly Scale is not available. Any light brown will suffice for the basis brick color. I also used Polly S Thinner (546008)
I am spraying Polly Scale paint that was thinned to approximately 60% Paint to 40% Thinner. The air brush used is a Badger Model 200 single action air brush attached to a regulated air supply with adequate oil and moisture traps.
Tip: I used the Polly Scale supplied thinner because it is specifically designed to be used with Poly-Scale paint. Yes, you can use other types of thinner substitutes however I know the Polly Scale brand works well with the paint because the thinner is specifically made for Polly Scale paint ensuring a great finish.
Brick Details
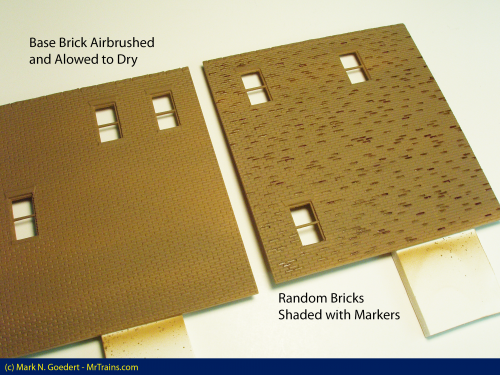
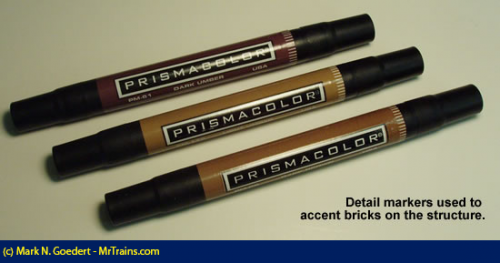
There are many ways to detail bricks. Markers will be used to introduce a variance in color to the brick faces. After the paint has dried overnight, I used markers with a fine tip to detail a varying pattern of bricks on the side of the building. The markers are made by Prismacolor and can be found at an art and craft supply store.
The following colors were selected: Dark Umber, Light Umber, Dark Brown Randomly color various bricks along each wall. You do not want to cover all the bricks with the markers, just enough to make the wall more interesting. I did not want the brick to have a heavy dark color so I mostly used the Light Umber and Dark Brown while saving the Dark Umber only for select bricks across the building.
Mortar Detail
We are looking to simulate the light-colored mortar between the bricks and This effect will be achieved using paint and color markers to create a brick and mortar effect.
Wash colors used: Polly Scale Concrete (F414317) (Equivalent MODELflex 16-11), Polly Scale US Brown Special (F505372) – Unknown Equivalent, Polly S Thinner (546008)
Make a wash to simulate the mortar between the bricks. The formula I used was 8 drops Concrete, 2 drops Brown, 30 drops thinner. This should be applied to all the brick surfaces on the building. It is fine if you are sloppy, the next step cover up any sloppy work. If after you apply the wash it seems like you ruined the brick work; don’t worry you didn’t.
Tip: Mortar isn’t grey! I mixed the concrete color with the basic brick color to reduce the contrast between the mortar and brick. This achieved a much more typical appearance of mortar when compared to the “stark white” technique. – Mark N. Goedert
Dry-brush Touch Up
To make the mortar color more subdued and ensure it is only between (not on top of) the bricks we need to rejuvenate the original brick color. To make the bricks stand out more I dry-brushed the brick faces with the original brick color.
Dry-Brush color used: Polly Scale US Brown Special (F505372) – Unknown Equivalent
Paint brush used: 1/4″ flat artist brush.
Dry brushing the color is a technique where you dip the tip of a flat paint brush into the paint and then wipe off most of the paint on a scrap paper or towel. You want the brush to have enough paint to leave a residue on the model to accent the edges of the brick. You do not want to have paint flow between the bricks because it will cover the grey mortar color in the previous step.
Painted Detail
For this step we need a steady hand and a paint brush with a good tip. You may think that a very small paint brush is needed however I have found that a larger brush with a good point works better. Smaller paint brushes can be more accurate however they do not hold a lot of paint so you will have to constantly dip the brush back into the paint jar as you work on the details.
Windowsill color: Polly Scale Roof Brown (414275) (Equivalent MODELflex 16-176)
Window ledge and stonework: Tamiya Sky Grey
Tip: Use a larger brush with a good point to paint details. The larger brush will hold more paint and prevent you from continuously going back to the pot for more paint.
– Mark N. Goedert.
Tamiya was used only because I had it handy on the paint rack, you can use any light grey color for the ledges and stonework. I used a #2 paint brush for the detail painting. This brush has a very nice tip and it holds the paint well. You may need to wash the brush during the painting process, if the brush gets clogged up with dry paint, take a break and wash it out. You do not want your work to have lumps of paint in it. When you finish washing the brush use your fingers to form a point on the end, this will keep the bristles in good shape for the next project.
Interior
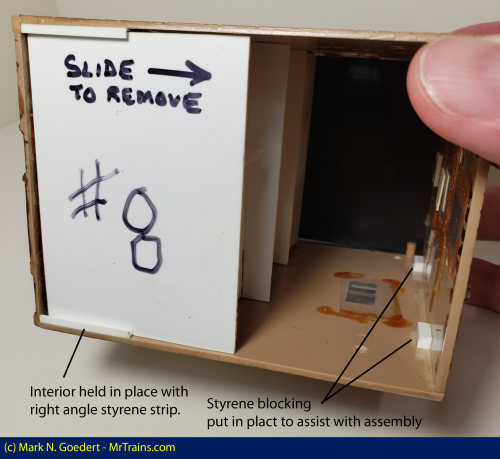
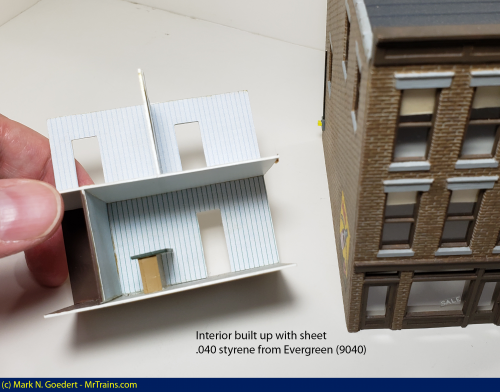
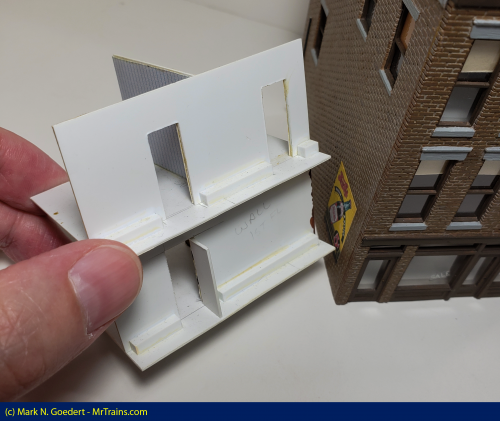
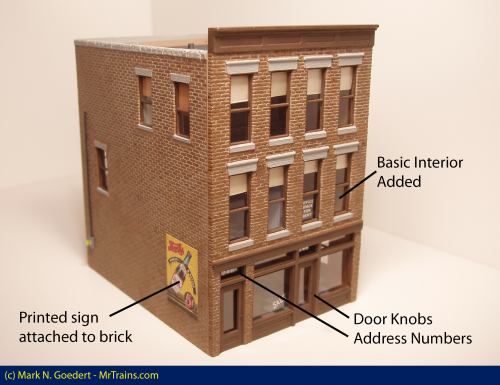
I did not want to have a structure that was easily seen through so I created a basic interior using .040 Styrene sheet.
The Bits That Make a Difference
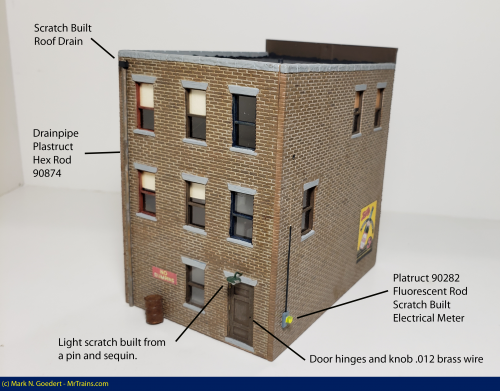
There are numerous details I added to this kit that used basic shapes. All of the items below were very economical and helped give the building a bit more character.
Drainpipes (Plastruct 90874, .060” (1.5mm) Styrene Hex Rod)
Drain holes on roof into drainpipes (Scratch built drain catch at roof-line)
Electrical meters (Plastruct 90282, 3/32” (2.4mm) Fluorescent Rod)
Electrical pole (polystyrene rod)
Address sign (decal numbers)
Door hinges (Detail Associates .012 Brass Wire (DA2504))
Doorknobs (Detail Associates .012 Brass Wire (DA2504) end dipped in CA)
Era appropriate signs
Light over rear entrance (shirt pin and sequin)
